This is an interior wall construction method (adhesive application method) for the masonry-style wall material "CAN'STONE."
Applicable substrate: calcium silicate board (specific gravity 1.0) (excluding gypsum board), structural plywood, mortar substrate
*For areas that will not be exposed to water, please use stone application adhesive (recommended: Can'Stone Adhesive MS-20 for interior wall imitation stone tiles). Check the application method of the adhesive for suitable substrates.
*Recommended base:
Calcium silicate plate, 8mm thick or more (specific gravity 1.0)
Flexible board 8mm thick or more Plywood 12mm thick or more
1. Surface preparation
A. In the case of a mortar base...
Inspect and clean the base. For Rathmol base, make sure it has been left for a sufficient period of time to cure, is completely dry, and is even.
b. Board (calcium silicate board, specific gravity: 1.0)/In the case of structural plywood base...
Make sure that the base is firmly fixed and that there are no unevenness in joints, etc.
*Recommended thickness: 8mm or more
※point※
When carrying out work in cold seasons, do not carry out work when the temperature is below 5°C or if it is expected that the temperature will drop below 5°C during the curing period after work.
2. Preparation for pasting
processing
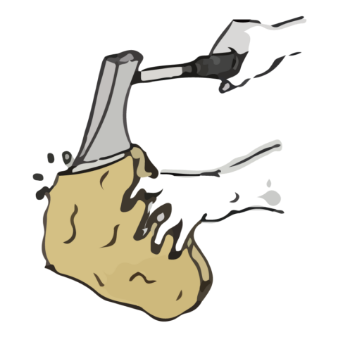
Please adjust the size of the stones to ensure a good fit.
Use a diamond cutter, hatchet, pliers, etc. to cut, mill, or separate the material in the areas that are as thin as possible.

3. Applying adhesive
Apply MS-20 (adhesive for Can'Stone interior wall imitation stone tiles) to the base using a 6mm toothed trowel.
The area you paint at one time should be the area that you can finish applying the stones to within the allotted time.
◎ If the effective bonding area is 70% or less, use an 8mm toothed trowel to increase the amount of MS-20 (adhesive for interior wall imitation stone tiles, Can'Stone) applied to the base, or increase the amount of MS-20 (adhesive for interior wall imitation stone tiles, Can'Stone) applied to the back of the stone.
4. Paste
1. Clean the back of the stone with a brush or similar, then use stone adhesive to attach it.
*Please check the application method of the adhesive you are using before installing.
2. If the installation location has corners, start installing from the corner.
The corner pieces have long and short sides, so they are attached alternately.
3. When attaching the flat pieces, first work your way up to fitting the larger stones.


5.Curing
Allow the mounting adhesive to harden for at least one day in summer, and at least three days in winter, without applying any external pressure.
6. Joint finishing
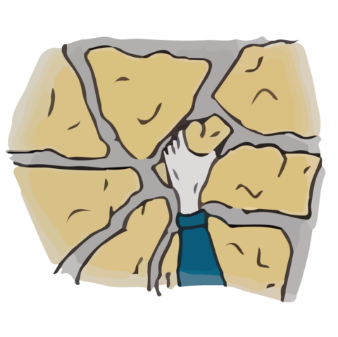
Fill the joints with our joint material MT-MEJI using a joint bag, etc. Fill the joints up to 1/2 the thickness of the stone to the same level, and make sure to fill in any areas that are lacking.
To finish the joints, press the filled MT-MEJI firmly with a joint trowel before it hardens, then use a brush or whisk to roughly scratch the joints.
※point※
◎ Don't worry if the joint trowel leaves uneven marks as you finish the job, and finally use a brush or scissors to scratch the joints in places to make them look weathered.
◎Do not install without joints.
◎Install the joints so that they cover about 1/2 the thickness of the stone to the same level.

7. Maintenance/Cleaning
Avoid ventilation and direct sunlight, and protect the stone by covering it with a sheet, etc. Allow the stone to cure for a sufficient period after application, and make sure it is completely dry. Then thoroughly brush off any dust on the stone surface and in the joints.
In tile work, we also take care of the joint design (creating nuance).
Once completely solidified, please have a cleaning company thoroughly brush away any initial dust from the rough joints.
◎Since CAN'STONE is a secondary cement product, acid washing is strictly prohibited.


